Z-Image Turbo ControlNet Workflow

In this walkthrough, I cover the Z-Image Turbo ControlNet model and the ComfyUI workflow I use with it. This is a Union ControlNet model that supports multiple control conditions, and I will keep the setup and steps in the same order I use when building and running the workflow.
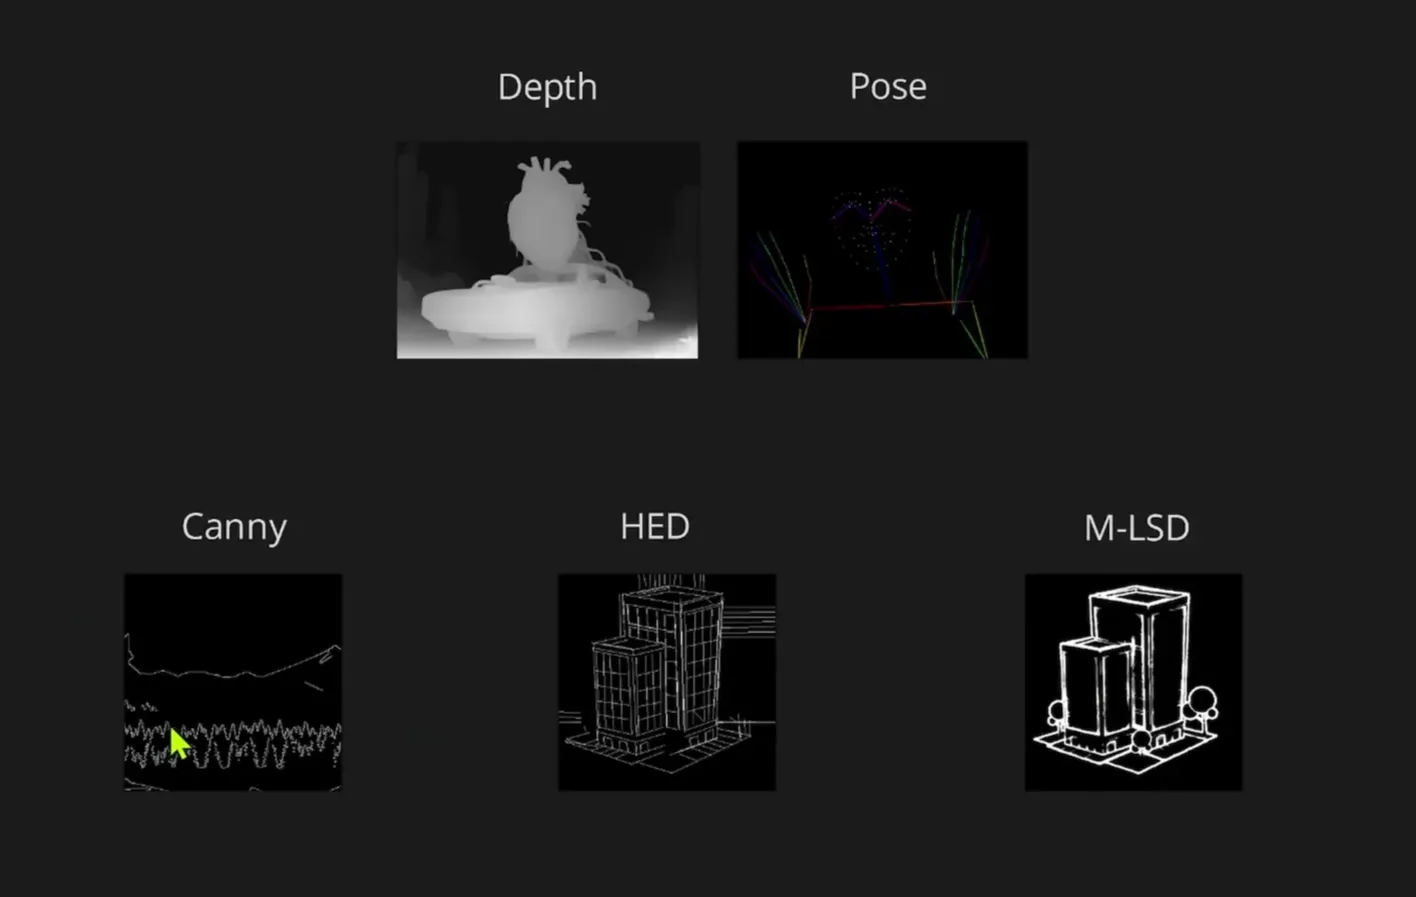
The supported control conditions include:
- Pose
- Canny edge
- Depth
I have generated multiple images on my machine and will be showcasing this workflow. For depth, you can use any depth model to produce the depth ControlNet pre-process image. For line-based conditioning, you can use any node that generates line pre-process images.
Base Workflow: Z-Image Turbo Text-to-Image
Start from the template
I begin with a typical Z-Image Turbo model. You can get it from the templates and select the Z-Image Turbo Text-to-Image workflow. Download the required models if you do not already have them.
Add a control image input
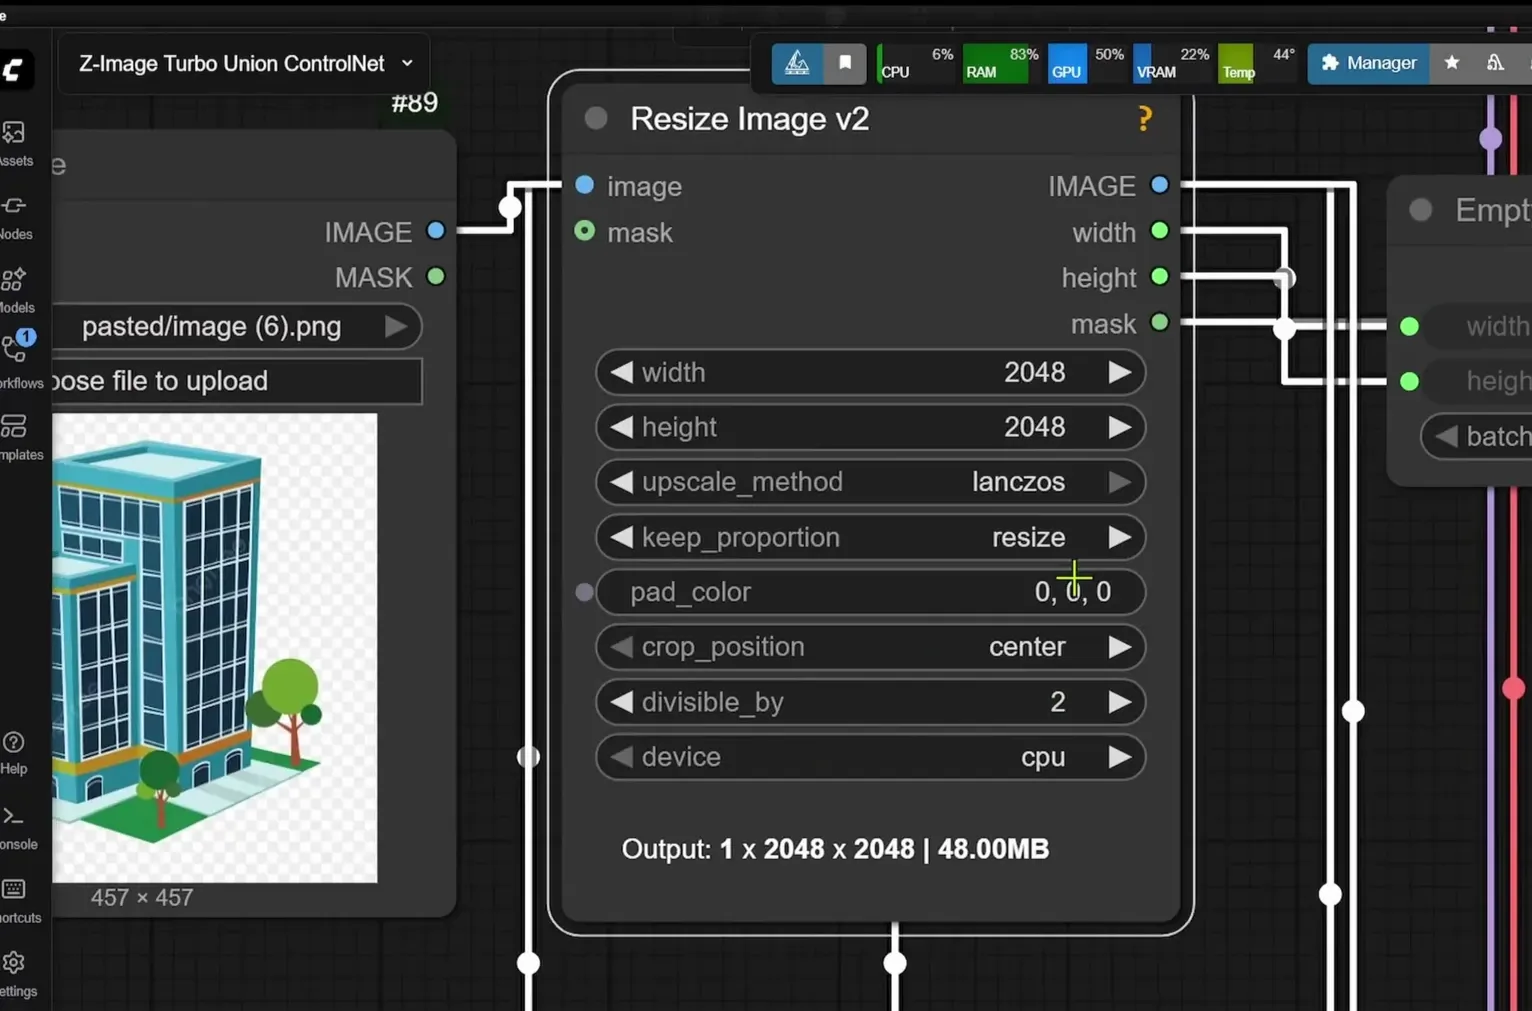
What is additional in this setup is the bottom section, where I pass an image for ControlNet. I add a Load Image node, which goes into a Resize Image node.
- This Resize Image node resizes and does not crop the initial image, so you will not be losing anything.
- The node outputs width and height, which I route into the K-Sampler.
Use the model patch with ControlNet
There is a model patch with ControlNet. You will need to update your ComfyUI to the latest version if:
- You do not have this node
- You have this node but cannot load the model
Update ComfyUI for the ControlNet Node
Update via ComfyUI Manager
To update ComfyUI to a version that supports this node:
- Open the Manager.
- Find Update ComfyUI stable version.
- Click the dropdown and select ComfyUI nightly version.
- Click Update ComfyUI.
If you want to do it from the ComfyUI Manager and it does not work, I recommend updating manually.
Update manually with the portable folder
To update manually:
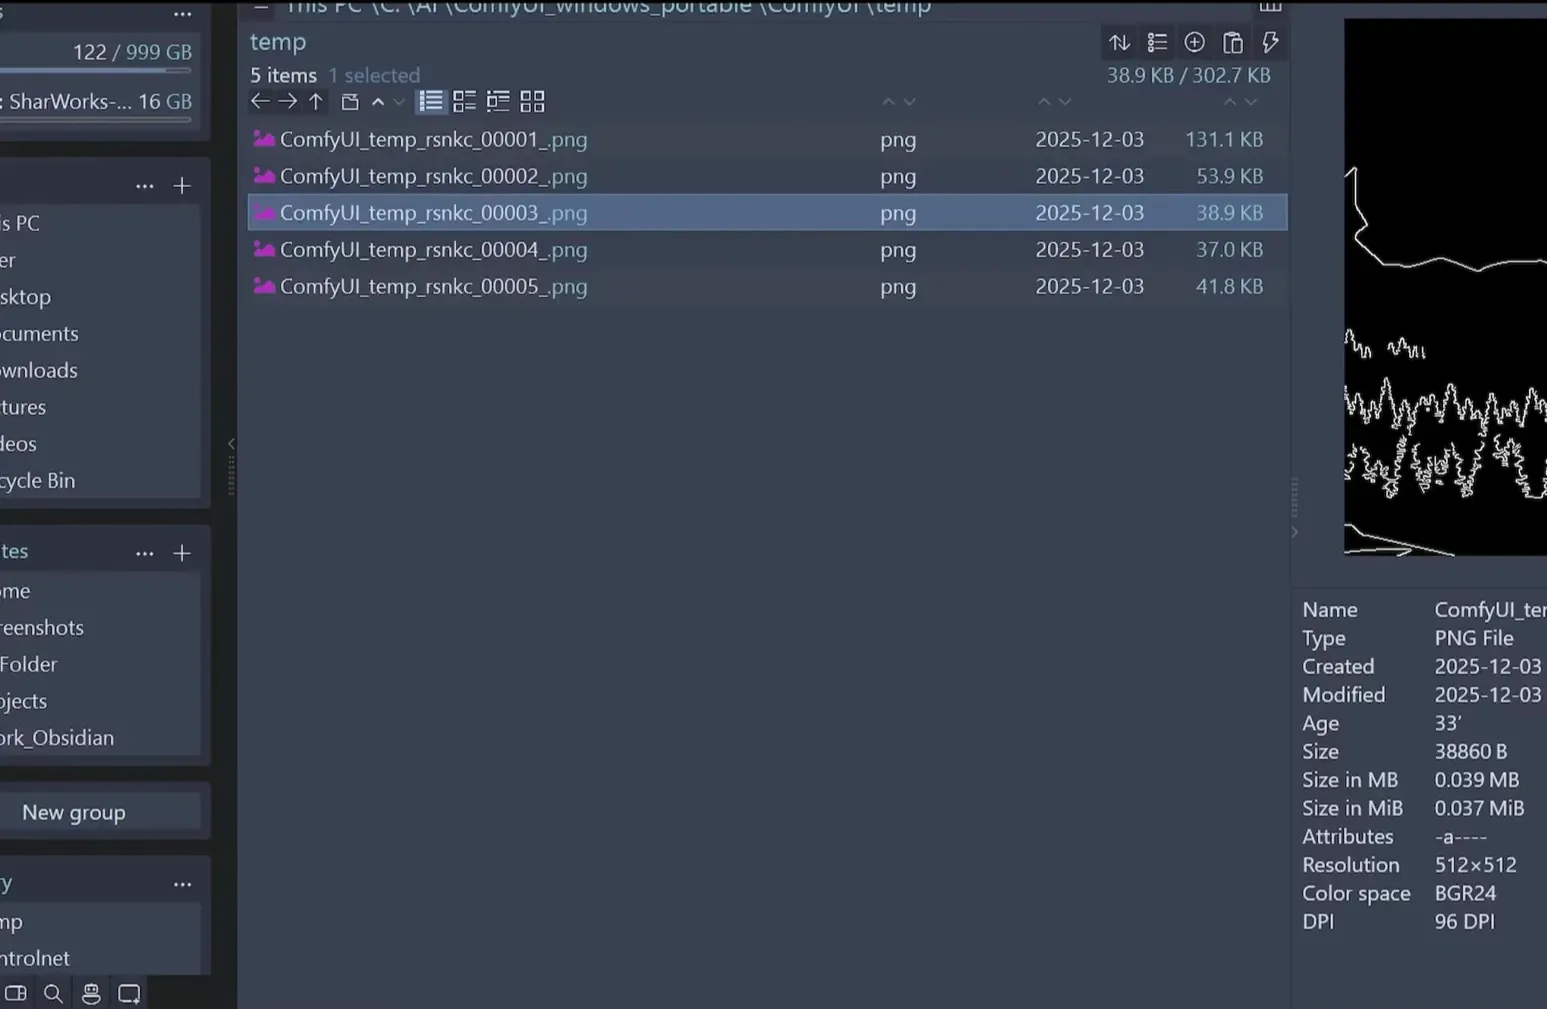
- Go to your ComfyUI portable folder.
- Open the update folder.
- Click on update ComfyUI.bat to update to the latest version.
This update ensures the node required to load the ControlNet model is available and works as expected.
Load the Z-Image Turbo ControlNet Model
Model patch loader connection
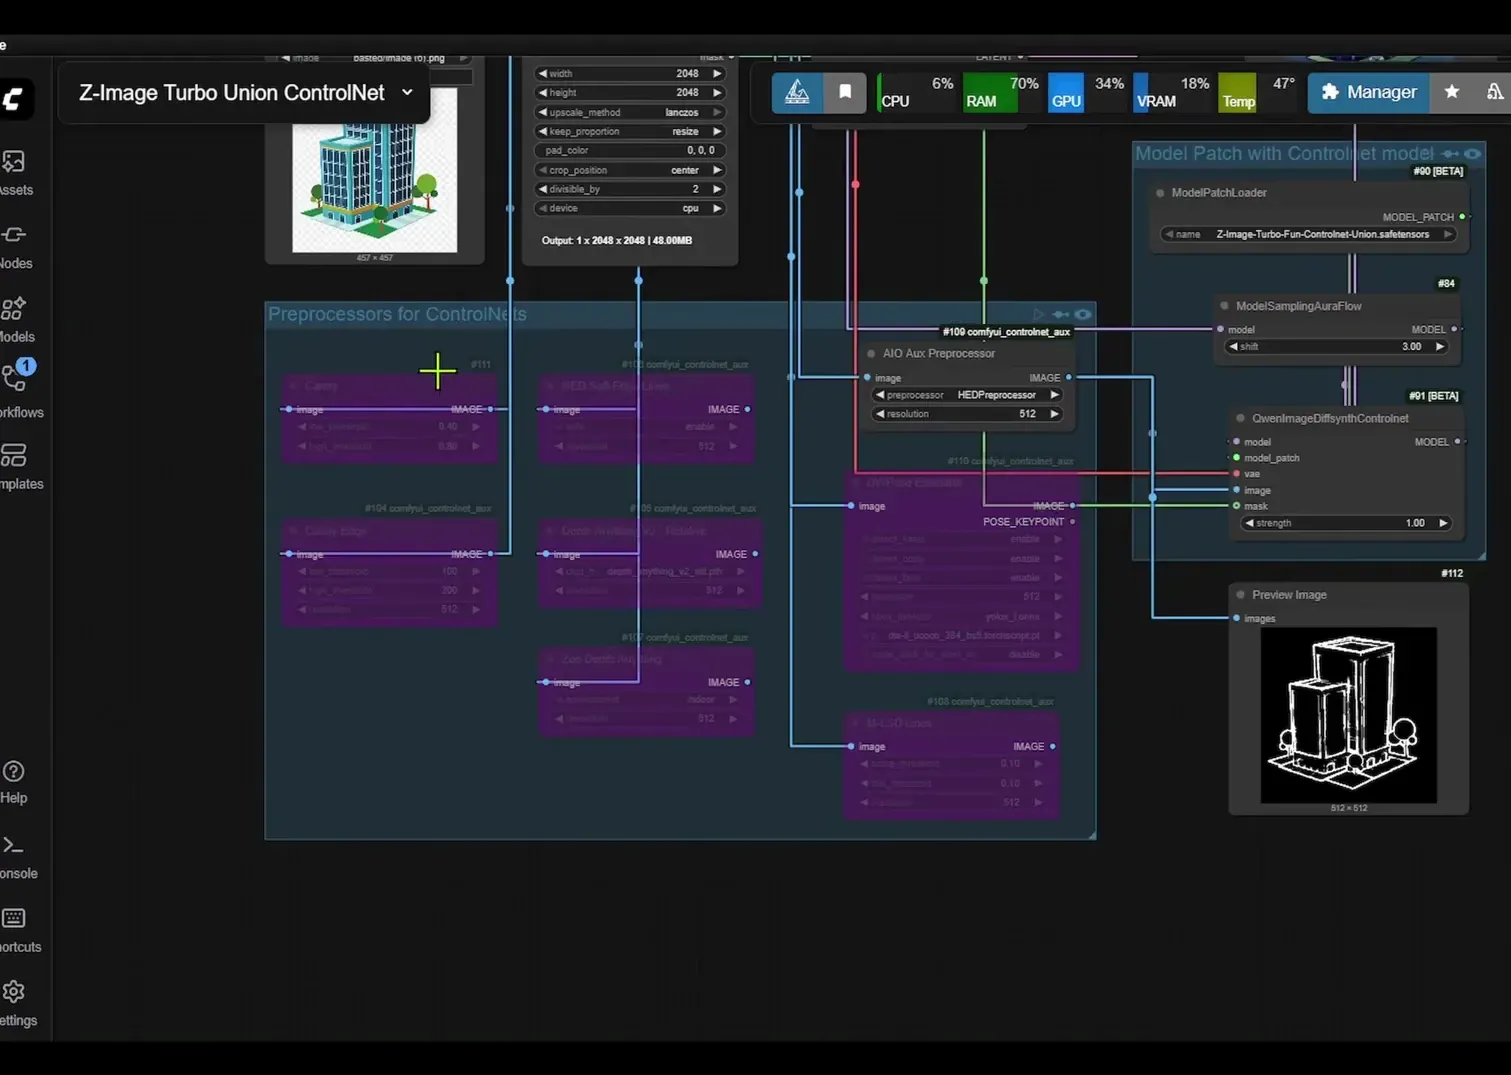
The model patch loader goes inside a quen image diff sync control net. That node accepts the pre-processed image, which I supply from a Group node dedicated to ControlNet pre-processing.
Download the Union ControlNet model
You can download the workflow and the model from the Hugging Face page:
- Go to Files and versions.
- Download the file named zimage turbo fun control net union.
Control Conditions and Pre-processing
Group node with multiple control conditions
In the Group node, I include all the different ControlNet conditions that work with this Union ControlNet. There are other versions of Canny as well. As long as they align base conditioning, they will work.
For depth, I add two options:
- depth anything version two
- zoe depth
For pose, use the dw pose estimator.
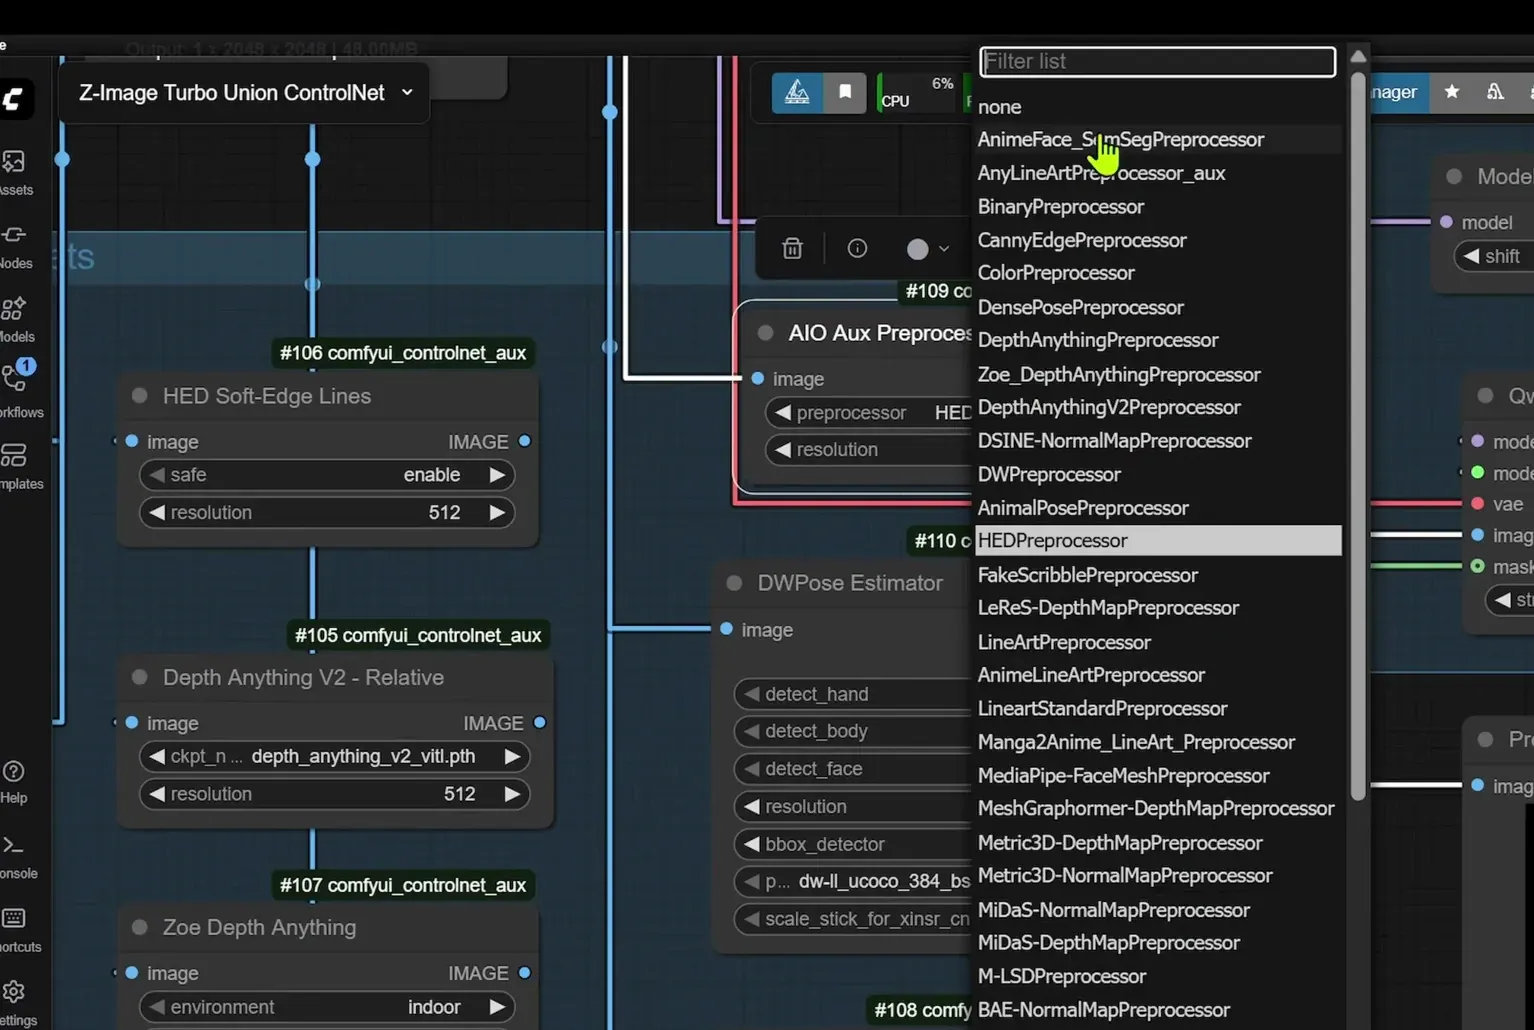
All-in-one Auxiliary Pre-process
To simplify setup, I also include an all-in-one auxiliary pre-process node. You can click on the dropdown, select any method from the list, and you should be good.
Use it like this:
- Disable the Group node first.
- Activate the all-in-one pre-processor by selecting it and clicking the unbypass option.
- Connect the image output to the quen image difference sync control net.
- Image goes into Image.
If you want to see the pre-process preview, connect the output to the Preview at the bottom.
Step-by-Step: Full ComfyUI Setup
1. Prepare the base workflow
- Open Templates and select Z-Image Turbo Text-to-Image.
- Download and load the Z-Image Turbo model if needed.
2. Add the ControlNet input path
- Add a Load Image node and point it to your reference or control image.
- Connect it to a Resize Image node that resizes without cropping.
- Route the width and height outputs from the resizing path into the K-Sampler so dimensions match the control input.
3. Ensure the ControlNet node is available
- Verify you have the model patch with ControlNet node in your ComfyUI.
- If it is missing or fails to load models, update ComfyUI to the nightly version using the Manager.
- If the Manager update fails, run update ComfyUI.bat from the ComfyUI portable folder.
4. Download the Union ControlNet model for Z-Image Turbo
- Visit the Hugging Face page for the model.
- Open Files and versions.
- Download zimage turbo fun control net union.
5. Wire the ControlNet model patch
- Insert the model patch loader into the quen image diff sync control net node.
- This node will accept your pre-processed image input.
6. Choose a pre-processing method
Option A - Multiple dedicated pre-processors inside a Group:
- Use specific pre-processing nodes for:
- Pose via dw pose estimator
- Canny edge via a Canny pre-processor
- Depth via depth anything version two or zoe depth
- Other Canny variants also work as long as they align base conditioning.
Option B - All-in-one auxiliary pre-process:
- Disable the pre-process Group node.
- Enable the all-in-one auxiliary pre-process and select your method from the dropdown.
- Click unbypass to activate it.
- Connect the all-in-one output to the quen image difference sync control net input.
- Connect to Preview at the bottom to inspect the pre-processed image.
7. Run the workflow
- Confirm image-to-image connections are correct:
- Image goes into Image for the ControlNet node.
- Confirm dimensions flow from the resizing path to the K-Sampler.
- Generate.
Notes on Pre-processing Choices
Control conditions supported in this setup
- Pose with dw pose estimator
- Canny edge with compatible Canny pre-processors
- Depth with depth anything version two and zoe depth
Other Canny variants work as long as they align base conditioning.
Resizing behavior for ControlNet
The resize node is set to resize and not crop the control image. This preserves the full content of the input while matching the dimensions required by the generation pipeline.
Group vs all-in-one pre-process
- Group gives fine-grained control with dedicated nodes for each condition.
- The all-in-one auxiliary pre-process simplifies switching conditions via a dropdown.
Performance and Speed Observations
Text-to-Image alone
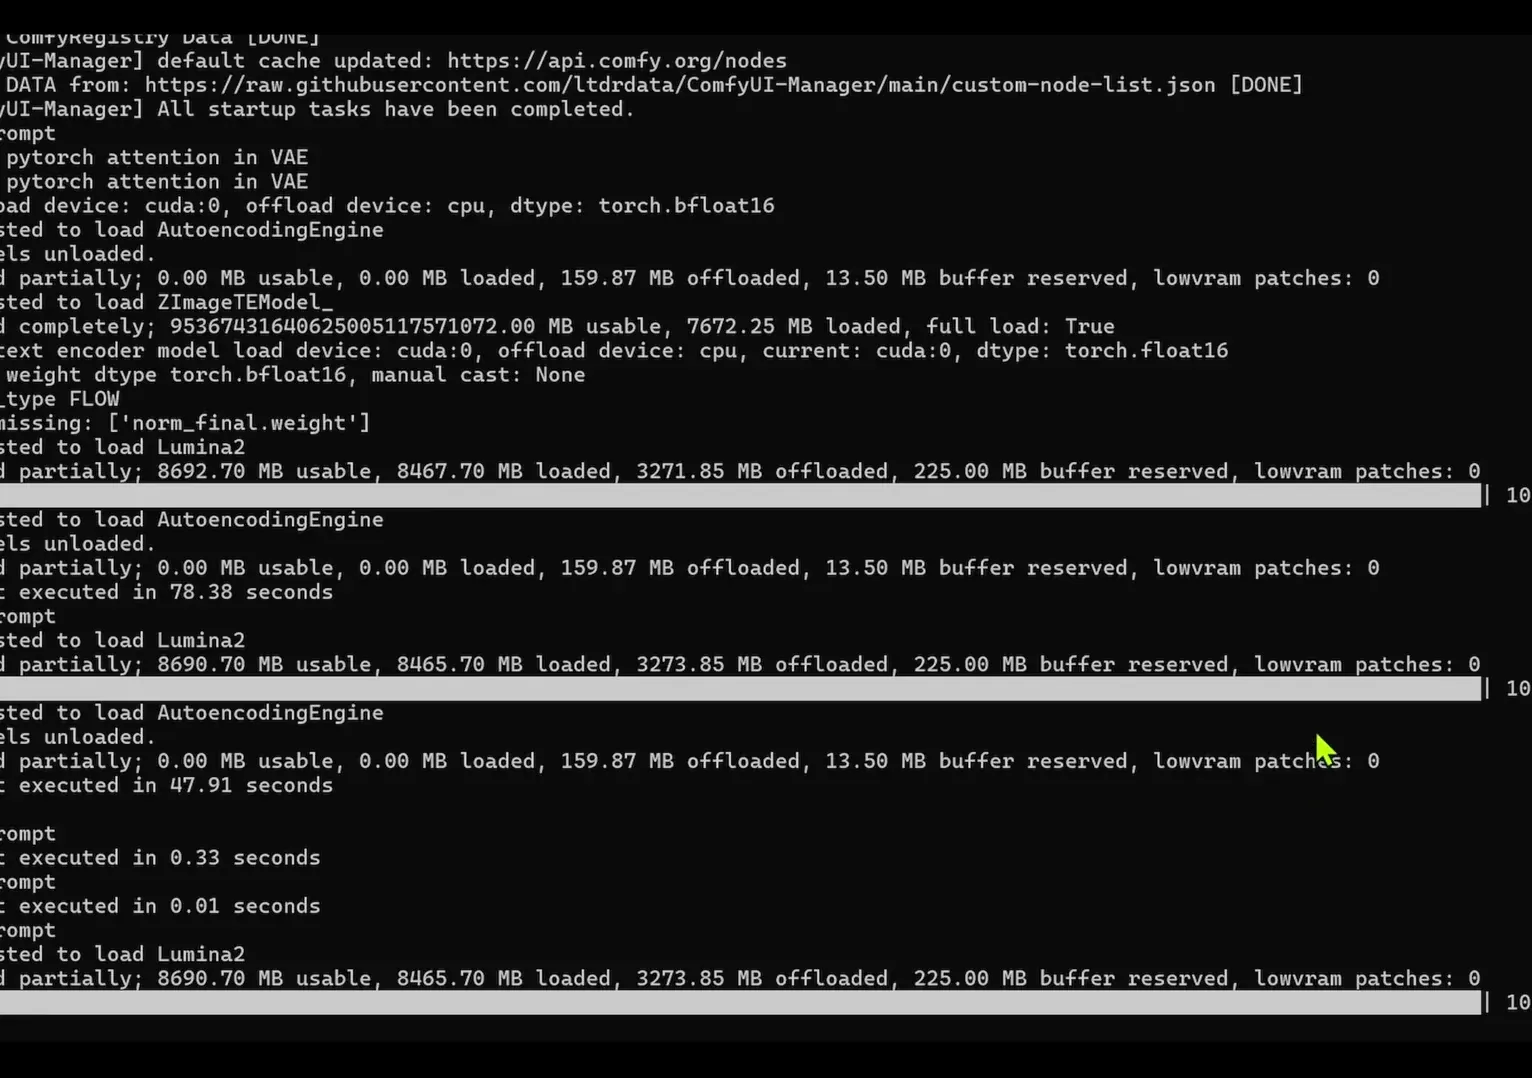
From my ComfyUI log when generating images with the Z-Image Turbo model at 10 steps:
- Inference time is about 40 seconds.
- Total time is about 78 to 79 seconds.
- This is for the text-to-image version without ControlNet.
With ControlNet added
When I add ControlNet to the same workflow:
- The generation step takes almost 3 minutes to produce the image.
- Total time for the entire workflow is about 190 seconds.
Comparative timing by resolution
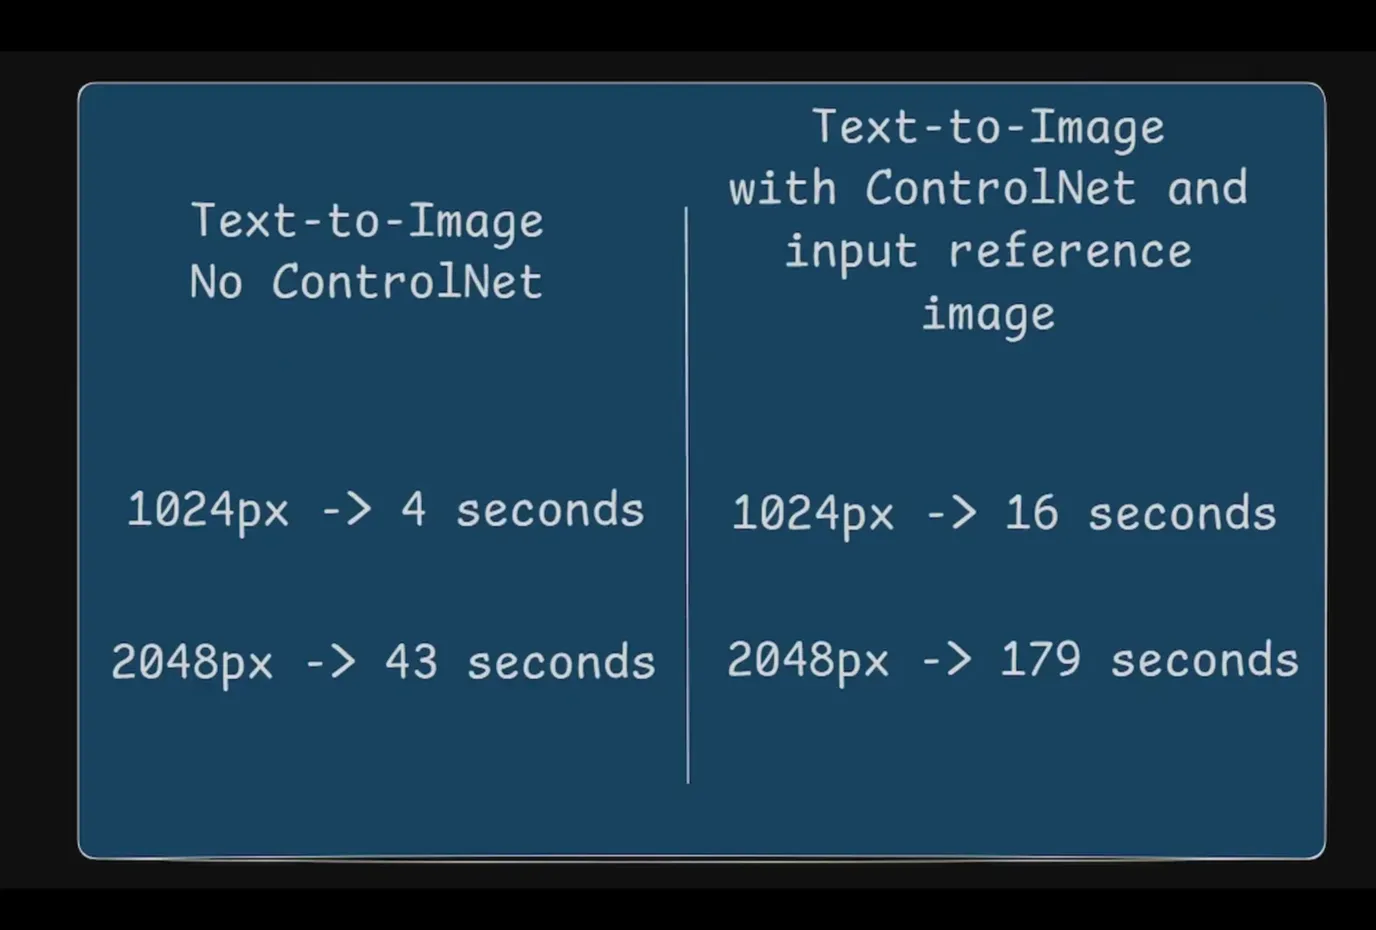
I also track the difference between running without ControlNet and with ControlNet using a reference image.
- At 1024 resolution without ControlNet: about 4 seconds per image.
- At 2048 resolution without ControlNet: about 43 seconds per image.
- At 1024 resolution with ControlNet and a reference image: about 16 seconds per image.
- At 2048 resolution with ControlNet and a reference image: about 179 seconds per image.
Timing summary
These numbers illustrate the additional time cost that ControlNet introduces. The increase is more noticeable at higher resolutions. The timing also varies based on the exact configuration and hardware.
Timing Comparison Table
| Configuration | Resolution | Time per image |
|---|---|---|
| Z-Image Turbo, no ControlNet | 1024 | ~4 s |
| Z-Image Turbo, no ControlNet | 2048 | ~43 s |
| Z-Image Turbo with ControlNet | 1024 | ~16 s |
| Z-Image Turbo with ControlNet | 2048 | ~179 s |
Additional observation from logs for a text-to-image run at 10 steps:
- Inference steps: ~40 s
- Total time: ~78 to 79 s
With ControlNet added in that context:
- Generation time: almost 3 minutes
- Total workflow time: ~190 s
Practical Checklist
Before you run
- Confirm the Z-Image Turbo Text-to-Image template is loaded.
- Ensure all required models are downloaded.
- Verify your ComfyUI version supports the model patch with ControlNet node.
- If needed, update to the nightly version or run update ComfyUI.bat.
Configure ControlNet
- Load the control image and feed it into a resize node that does not crop.
- Route width and height outputs to the K-Sampler.
- Insert the model patch loader into the quen image diff sync control net node.
Choose your control condition
- Pose: set up dw pose estimator.
- Canny: use a Canny pre-processor that aligns base conditioning.
- Depth: select depth anything version two or zoe depth.
- Optionally use the all-in-one auxiliary pre-process with the unbypass toggle.
Validate connections
- Image goes into Image on the quen image difference sync control net node.
- Connect to Preview at the bottom if you want a quick visual check.
Final Notes
This setup is the first ControlNet I have for the Z-Image Turbo model. It supports multiple control conditions in one Union ControlNet workflow, and it runs reliably once ComfyUI is updated to a version that supports the model patch with ControlNet. The pre-processing path is flexible, with the option to use dedicated nodes or an all-in-one auxiliary pre-processor.
The timing results show a clear difference in generation time when adding ControlNet, especially as resolution increases. Keeping an eye on resolution and pre-processing choices helps balance quality and speed in this workflow.
Recent Posts

How to Improve Text on Z-Image Turbo?
Z-Image-De-Turbo: A de-distilled variant of Z-Image-Turbo for flexible training, LoRA development, and extended experimentation without adapters.
Z-Image-De-Turbo de-distilled variant of Z-Image
Z-Image-De-Turbo: A de-distilled variant of Z-Image-Turbo for flexible training, LoRA development, and extended experimentation without adapters.

Zimage Turbo Beats FLUX 2: Local AI Image Generation
Meet Tongyi/Alibaba’s Zimage Turbo: stunning local AI image results with sharp anatomy. See examples and get the ComfyUI workflow that outshines FLUX 2.
Comments
Loading comments...